Follow the steps in the mySugr app to apply the Accu-Chek SmartGuide sensor.
Open the SmartGuide app to view step-by-step instructions
After setting up the mySugr app, go to Connections, select Accu-Check SmartGuide then tap Connect. When you applied the sensor, tap Next.
You will need:
- The mySugr app
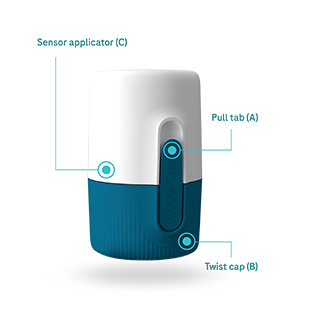
- A new, unused Accu-Chek SmartGuide device (pictured on the left.)
- Alcohol wipes to disinfect the application site.
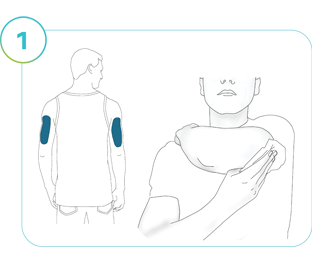
Step 1
Select your right or left arm to apply the sensor. Disinfect the application site with an alcohol wipe to ensure clean, oil-free skin, and let it dry completely. Take care of your skin when using a CGM solution. Each time you replace the sensor, choose a new location to apply it so that the previous spot can rest and heal properly.
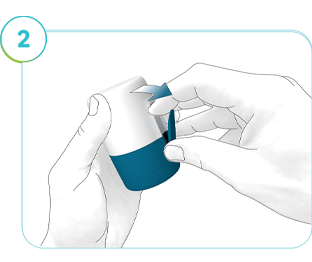
Step 2
Slightly flip the pull tab (2) open. If the pull tab has already been opened before use, discard the device and use a new one.
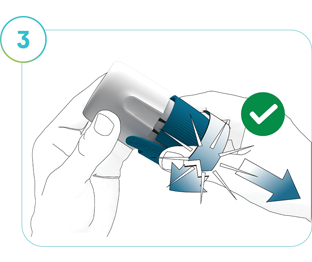
Step 3
Do not press on the device. Turn the twist cap (B) to open the sterile barrier. You will feel a slight resistance and hear a cracking sound. Pull the twist cap from the applicator (C). Don’t touch the needle inside. Don’t put the blue twist cap back on after you have removed it, and don’t discard it yet.
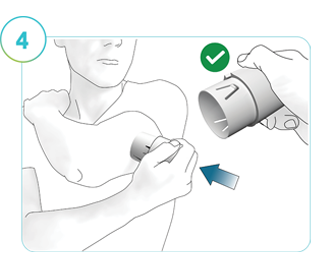
Step 4
Place the hand of the disinfected arm on your opposite shoulder. This helps to tighten the skin. Reach under your arm and place the applicator (C) on the application site. Hold the applicator by the external housing. Press down firmly to insert the sensor.
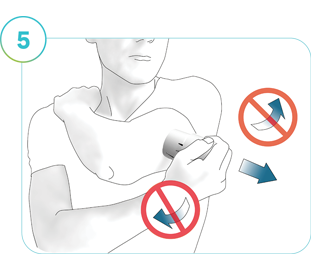
Step 5
Remove the applicator in the same direction without rotating or wiggling it. Swipe over the adhesive pad firmly with your finger to make sure the adhesive pad is properly attached.
You can wear the sensor for 14 days.
Important Info
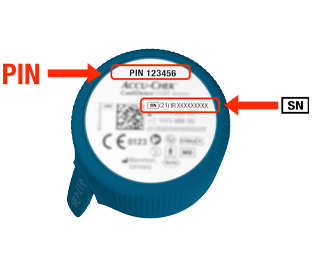
After you’ve applied the sensor, follow the pairing instructions in the app. You’ll need the PIN code printed on the applicator's twist cap — do not discard it until the pairing is complete.
How helpful did you find this training?
Continue Training
Previous step
Get in touch
Chat with us
Online Sun-Fri from 8 a.m. to 7 p.m. Gulf Standard Time
Give us a call
Sun-Fri from 8am-7pm
Holiday Hours
Our customer care team is fully operational even during public holidays from Sun- Fri from 8am-7pm.