Product Support
Accu-Chek Performa
The Accu-Chek Performa meter is designed to be used with the Accu-Chek Performa test strip to quantitatively measure glucose in fresh venous, arterial, neonatal, and capillary whole blood as an aid in monitoring the effectiveness of glucose control.

Product Support
Accu-Chek Performa
The Accu-Chek Performa meter is designed to be used with the Accu-Chek Performa test strip to quantitatively measure glucose in fresh venous, arterial, neonatal, and capillary whole blood as an aid in monitoring the effectiveness of glucose control.
Getting started with your device
Learn the basics of of how to get started with your Accu-Check devices.
How to use the new Accu-Chek Performa with the Softclix lancing device
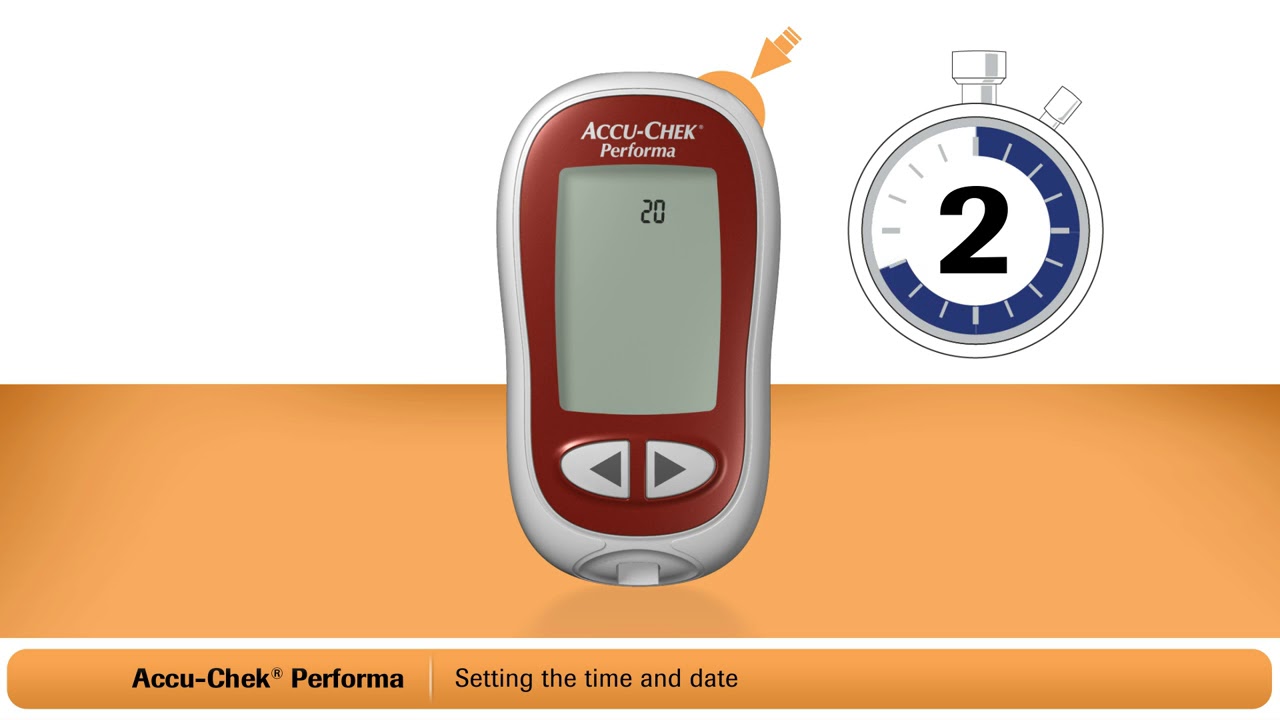
How to Set the Time & Date of the Accu-Chek Performa
The Accu-Chek Performa meter is not approved for use in clinical settings in the United States and Canada, although the Accu-Chek Performa meter is cleared to test capillary, venous, arterial, and neonatal blood samples.
- Refer to the instructions in the user's manual on how to appropriately handle any errors that may occur.
- If the instructions in the user’s manual does not correct the situation, please contact our Roche Diabetes Care Customer Care Center as per your country of residence to obtain further support.
Your Accu-Chek lancing device has a special plastic cap designed for testing on other areas of the body. Talk with your healthcare professional before deciding if alternate site testing is right for you.
Note: Do not use the special plastic cap when testing at the fingertip. Follow the steps for fingertip testing, with a few differences:
- Use the clear or gray cap.
- You may need a deeper setting. Try 3 for palm testing or 5-1/2 for forearm or upper arm testing. (These are suggested settings; yours may differ.)
- Press the opening of the clear or gray cap firmly against a fleshy area of the non-fingertip site. Press the lancing device up and down in a slow pumping motion to assist the flow of blood.
- Keep steady pressure on the area, then press and release the plunger. Do not be afraid to apply pressure to the area with the lancing device to assist the flow of blood. Continue to press the cap against the site for a few seconds to allow blood to come to the surface.
There are three types of averages: general, pre-meal and post-meal. To view results and averages, press and release left and right arrows to view stored results. The most recent test result appears on the display.
- Press the left arrow to view previous test results from newest to oldest.
- Press the right arrow to view 7-, 14-, 30- and 90-day general averages.
- Continue to press the right arrow to view 7-, 14-, 30- and 90-day pre-meal and post-meal averages.
1. Perform a test. The result appears on the display.
2. Leave the test strip in the meter. Press and release or to toggle through test result markers and the post-meal reminder:
- Pre -meal marker
- Pre-meal marker with post-meal reminder
- Post-meal marker
- General marker
3. When the marker or test reminder you wish to select appears on the display, remove the test strip from the meter.


Get helpful product documentation.
View and download the resources you need.
Get in touch
Online Sun-Fri from 8 a.m. to 7 p.m. Gulf Standard Time
Sun-Fri from 8am-7pm
Holiday Hours
Our customer care team is fully operational even during public holidays from Sun- Fri from 8am-7pm.